Printing Organizers
You can print organizers in two ways:
- From an open return, print organizers one at a time.
- From Return Manager, print a batch of organizers.
Printing an Open Return's Organizer
- Open the return.
- Do one of the following:
- Click the Print toolbar button.
- Click the Returns menu; then, select Print Returns.
- Press Ctrl+P.
Printing Organizers for Marked Returns
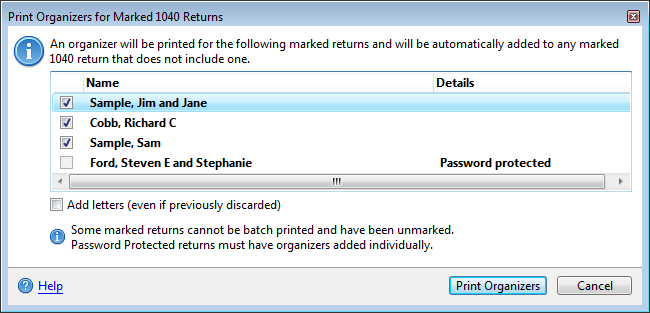
In most cases, you can print a batch of 1040 returns from the Return Manager. The only exceptions are returns that are password-protected, or returns that are currently open: in both of these cases, you must add the Organizer from inside the return.
The Print Organizer for Marked 1040 Returns prints according to your settings on the Select Forms Preferences tab. Check your preference settings before using these feature to ensure the appropriate organizer and/or organizer letters are added to the returns.
- In Return Manager, mark the returns for which you want to print an Organizer.
- Click the Returns menu; then, select Organizers.
- Select Print Organizers for Marked Return.
The Print Organizers for Marked Returns dialog box appears:

Printing Organizers for Marked Returns
- Click Print Organizers.
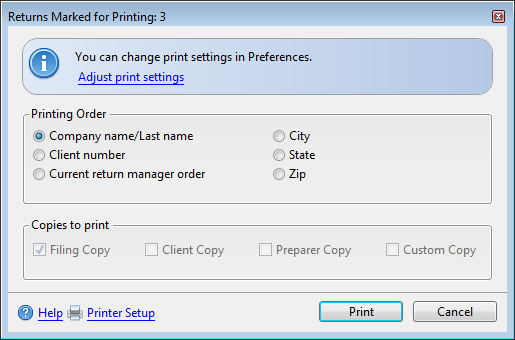
The Returns Marked for Printing dialog box appears:

Returns Marked for Printing dialog box
- Make adjustments to the printing order if desired.
The Copies to print options are set in your Print Preferences.
- Click Print.
The Print Progress dialog box appears.
- Click Close when you're finished.